 |
||||||||||||||||||||||
|
|||||||||||||||||||||||||||||||||||||||||||||||||||||||||||||||
To add a system DSN to the ASP Server, use the following procedure. When you add a DSN, Sun Chili!Soft ASP automatically sets the correct parameters for the databases. If necessary, you can edit these parameters, as described in "Editing a DSN" in this chapter.
Notes about specific databases
Microsoft Access and Microsoft SQL Server 6.5: Sun Chili!Soft ASP includes an ODBC driver for Microsoft SQL Server 7.0 and 2000, but you must use SequeLink 4.51a for connecting to Microsoft Access and Microsoft SQL Server 6.5 databases. You can create a DSN for SequeLink using the procedure in this topic. However, before you do this, you must first take the steps described in "Configuring SequeLink" in this chapter.
Oracle and Informix: For these databases, after adding a DSN you must also define database environment variables, as described in "Configuring the Database Environment" in this chapter. Unless the environment variables have been set previously, after you finish adding a new DSN, the Administration Console opens the appropriate page on which to configure these settings.
To add a system DSN
1. Open the Administration Console by using the following URL:
where [HOSTNAME] is the hostname of your Web server and [PORT] is the port on which the Administration Console is running (5100 by default).
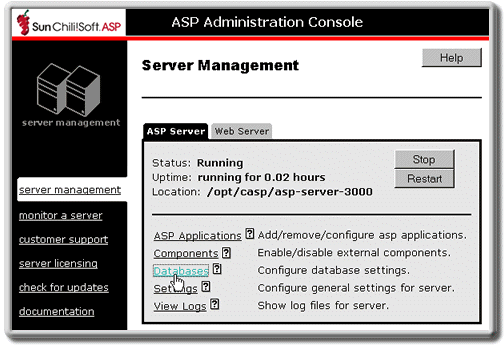
2. On the ASP Server tab of the Server Management page (the first page to display when you open the Administration Console), click Databases.

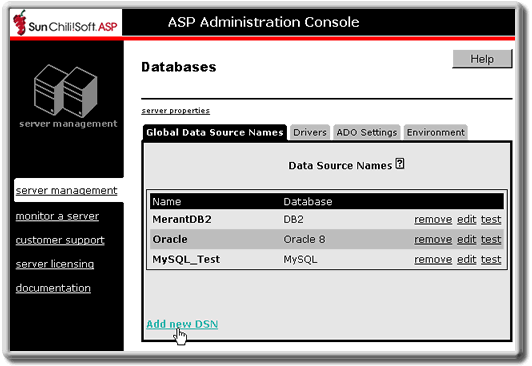
3. On the Databases page, click Add new DSN.

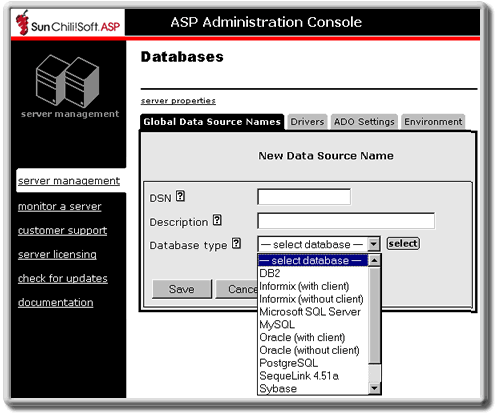
The New Data Source Name page displays.

4. In the DSN box, type a name for the DSN.
5. If desired, in the Description box, type a description of the DSN to help distinguish it from other DSNs.
6. In the Database type drop-down list, select the type of database for which you want to configure a DSN (for Microsoft Access and Microsoft SQL Server 6.5 databases, select SequeLink 4.51a).
7. In the remaining text boxes, provide the requested information. For more information, see the topic for your database in "Configuring Database Parameters" in this chapter.
8. To save your changes, click Save, and then click Done.
- or -
Click Cancel to revert to the last settings that were saved.
The new DSN displays in the Data Source Names list. After adding a DSN, it is a good idea to test it, as described in "Testing a DSN" in this chapter.
Note
For Windows systems, data source names are created and managed from the Windows Control Panel. See Microsoft documentation for more information about using the Windows ODBC Data Source Administrator.
See also:
Configuring Data Source Names (DSNs) in this chapter
Removing a DSN in this chapter
Editing a DSN in this chapter
Enabling Database Connections on the Server in "Chapter 2: Installing and Configuring Sun Chili!Soft ASP"
Copyright 2002 Sun Microsystems, Inc. All rights reserved. Legal Notice.